Photogrammetry and 3D printing
10/06/2021
- design and 3D print an object (small, few cm3, limited by printer time) that could not be made subtractively- 3D scan an object (and optionally print it)
In terms of coming up with ideas this was an especially hard week. I have previous experience in 3D printing but coming up with a creative idea was hard.
I had a bunch of ideas that I went though (if you are taking this class in the future, feel free to take some):
- Snake or Fish with articulating joints
- Carabiner with compliant locking mechanism
- Bracelet of print-in-place hinges
- Pencil holder that's a twisted lattice
- Getting model of a building and doing a cross section
First Attempts at Scanning
So I thought I'd start with Assignment objective #2 and then figure out what I'd do for objective one first. During the lecture, Neil mentioned a photogrammetry program called Meshroom. Meshroom, he mentioned, is open source, had a pretty intuitive interface, and worked well; all attributes that attracted me. Fortunately, my laptop has the NVIDIA CUDA cores that Meshroom wants for processing. But what to scan? After a brief look around my dorm room, I saw a nice little succulent my roomate owned that looked like it would be a cool print:
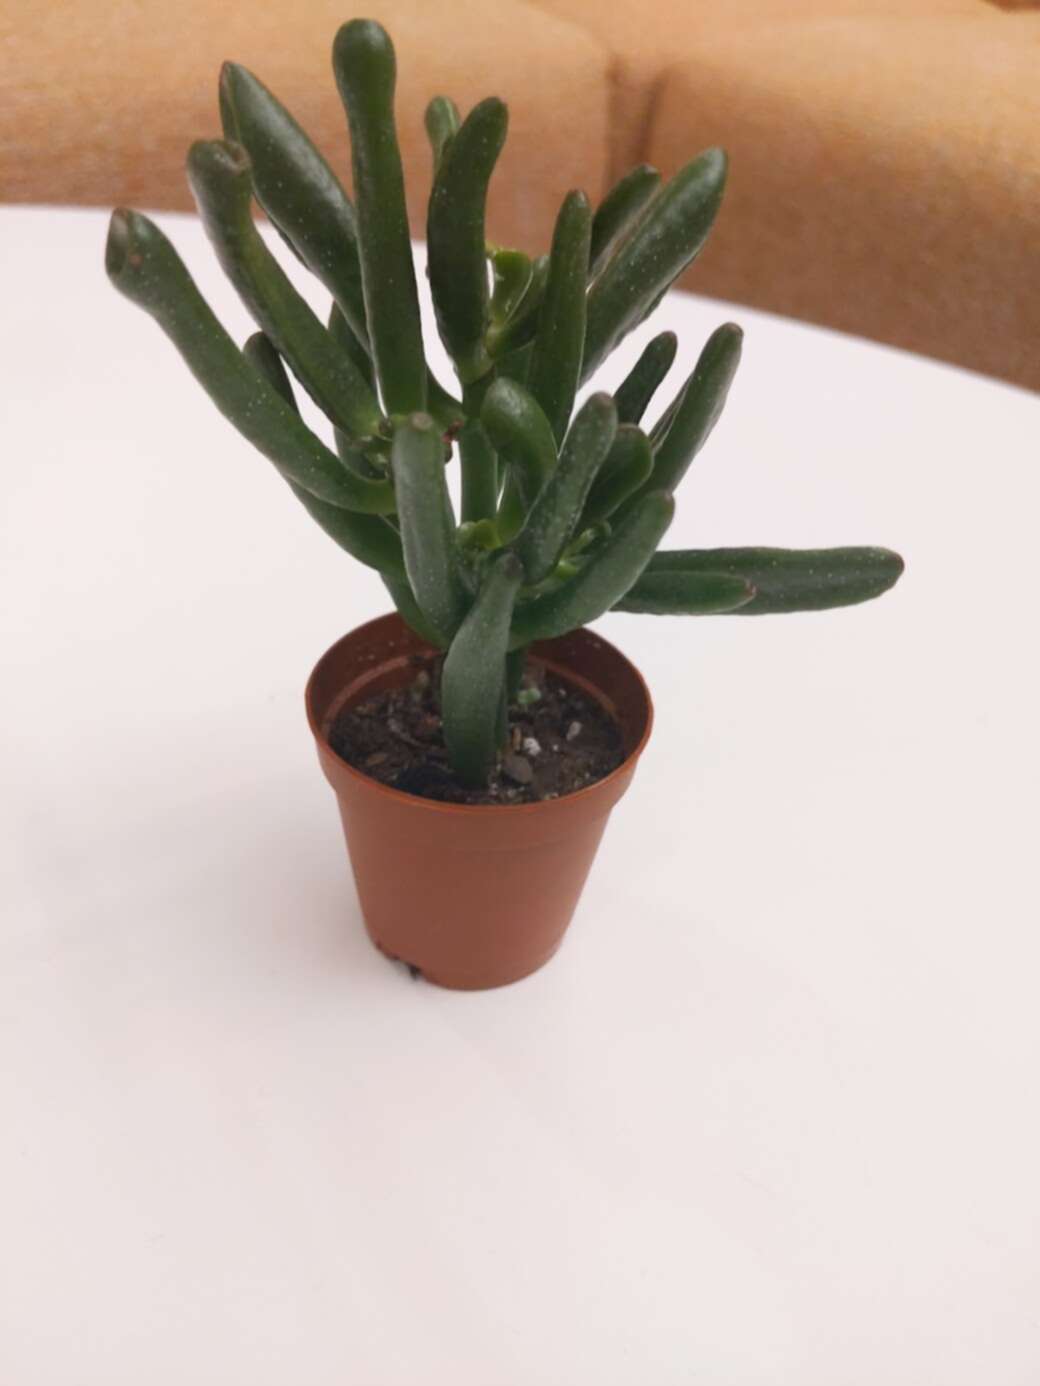
So, following the online guides, I tried to light it evenly and then take a bunch of photos(48) from all sorts of angles. Then I stuck it into the Meshroom software and it only recognized like 12 of the photos and generated some dots that if you were S-tier at connect-the-dots could barely make out the plant. But what was causing this? Surely not a bad subject.
MORE PHOTOS THEN Thinking I should get better lighting and easier access to more angles, I moved it to the dorm's lounge area and took more photos, making sure to lock the exposure and white balance(using an app called Open Camera). So I stuck these photos into Meshroom and, shocker, got almost the exact same result out. After finally going to the documentation to see what could be going wrong, I saw that all the examples were way more continuous and less "spikey".
Chicken time
Back to looking for ideas, I saw another of my roommates posessions: a chicken statue decoration. It seemed much more achievable to scan than the plant, it didn't have any super complex geometry, odd light scattering, and was bigger.
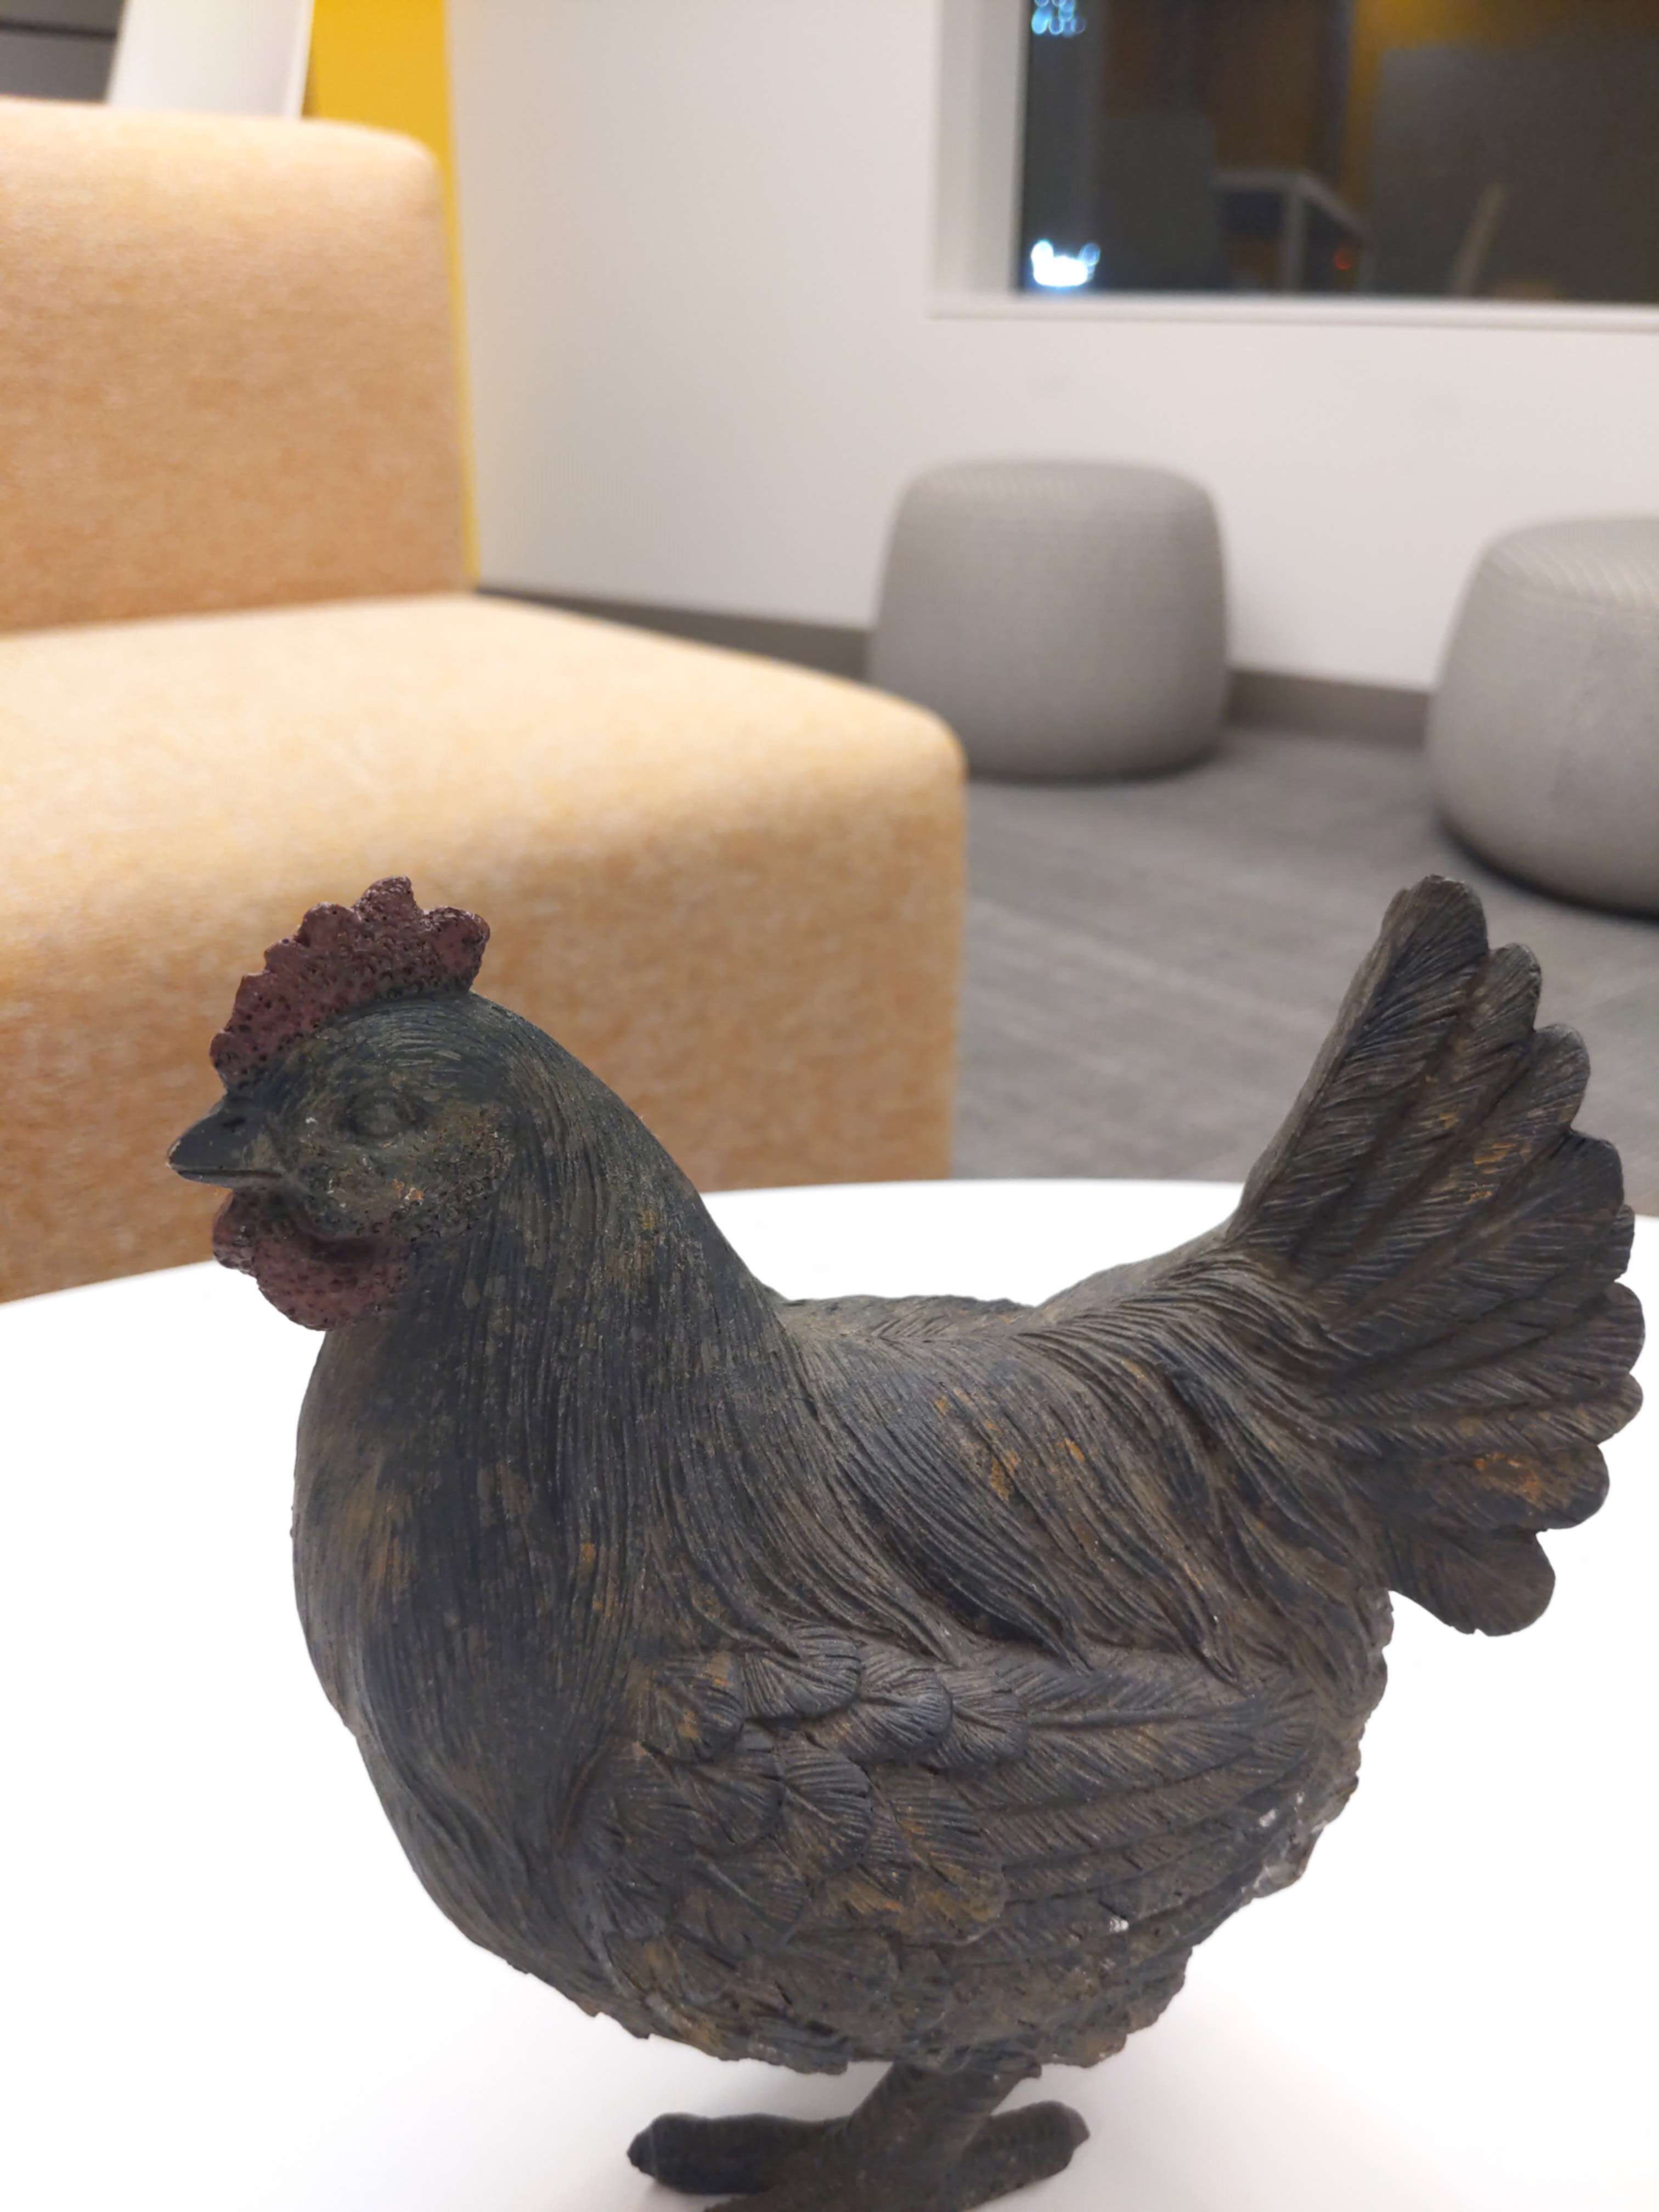
Using Open Camera and the lounge coffee table again, I took way more photos this time: 107 different shots. After putting it into Meshroom and adding a SFMTransform between StructureFromMotion and PrepareDenseScene to make it upright in the viewport, I got this glorious view:
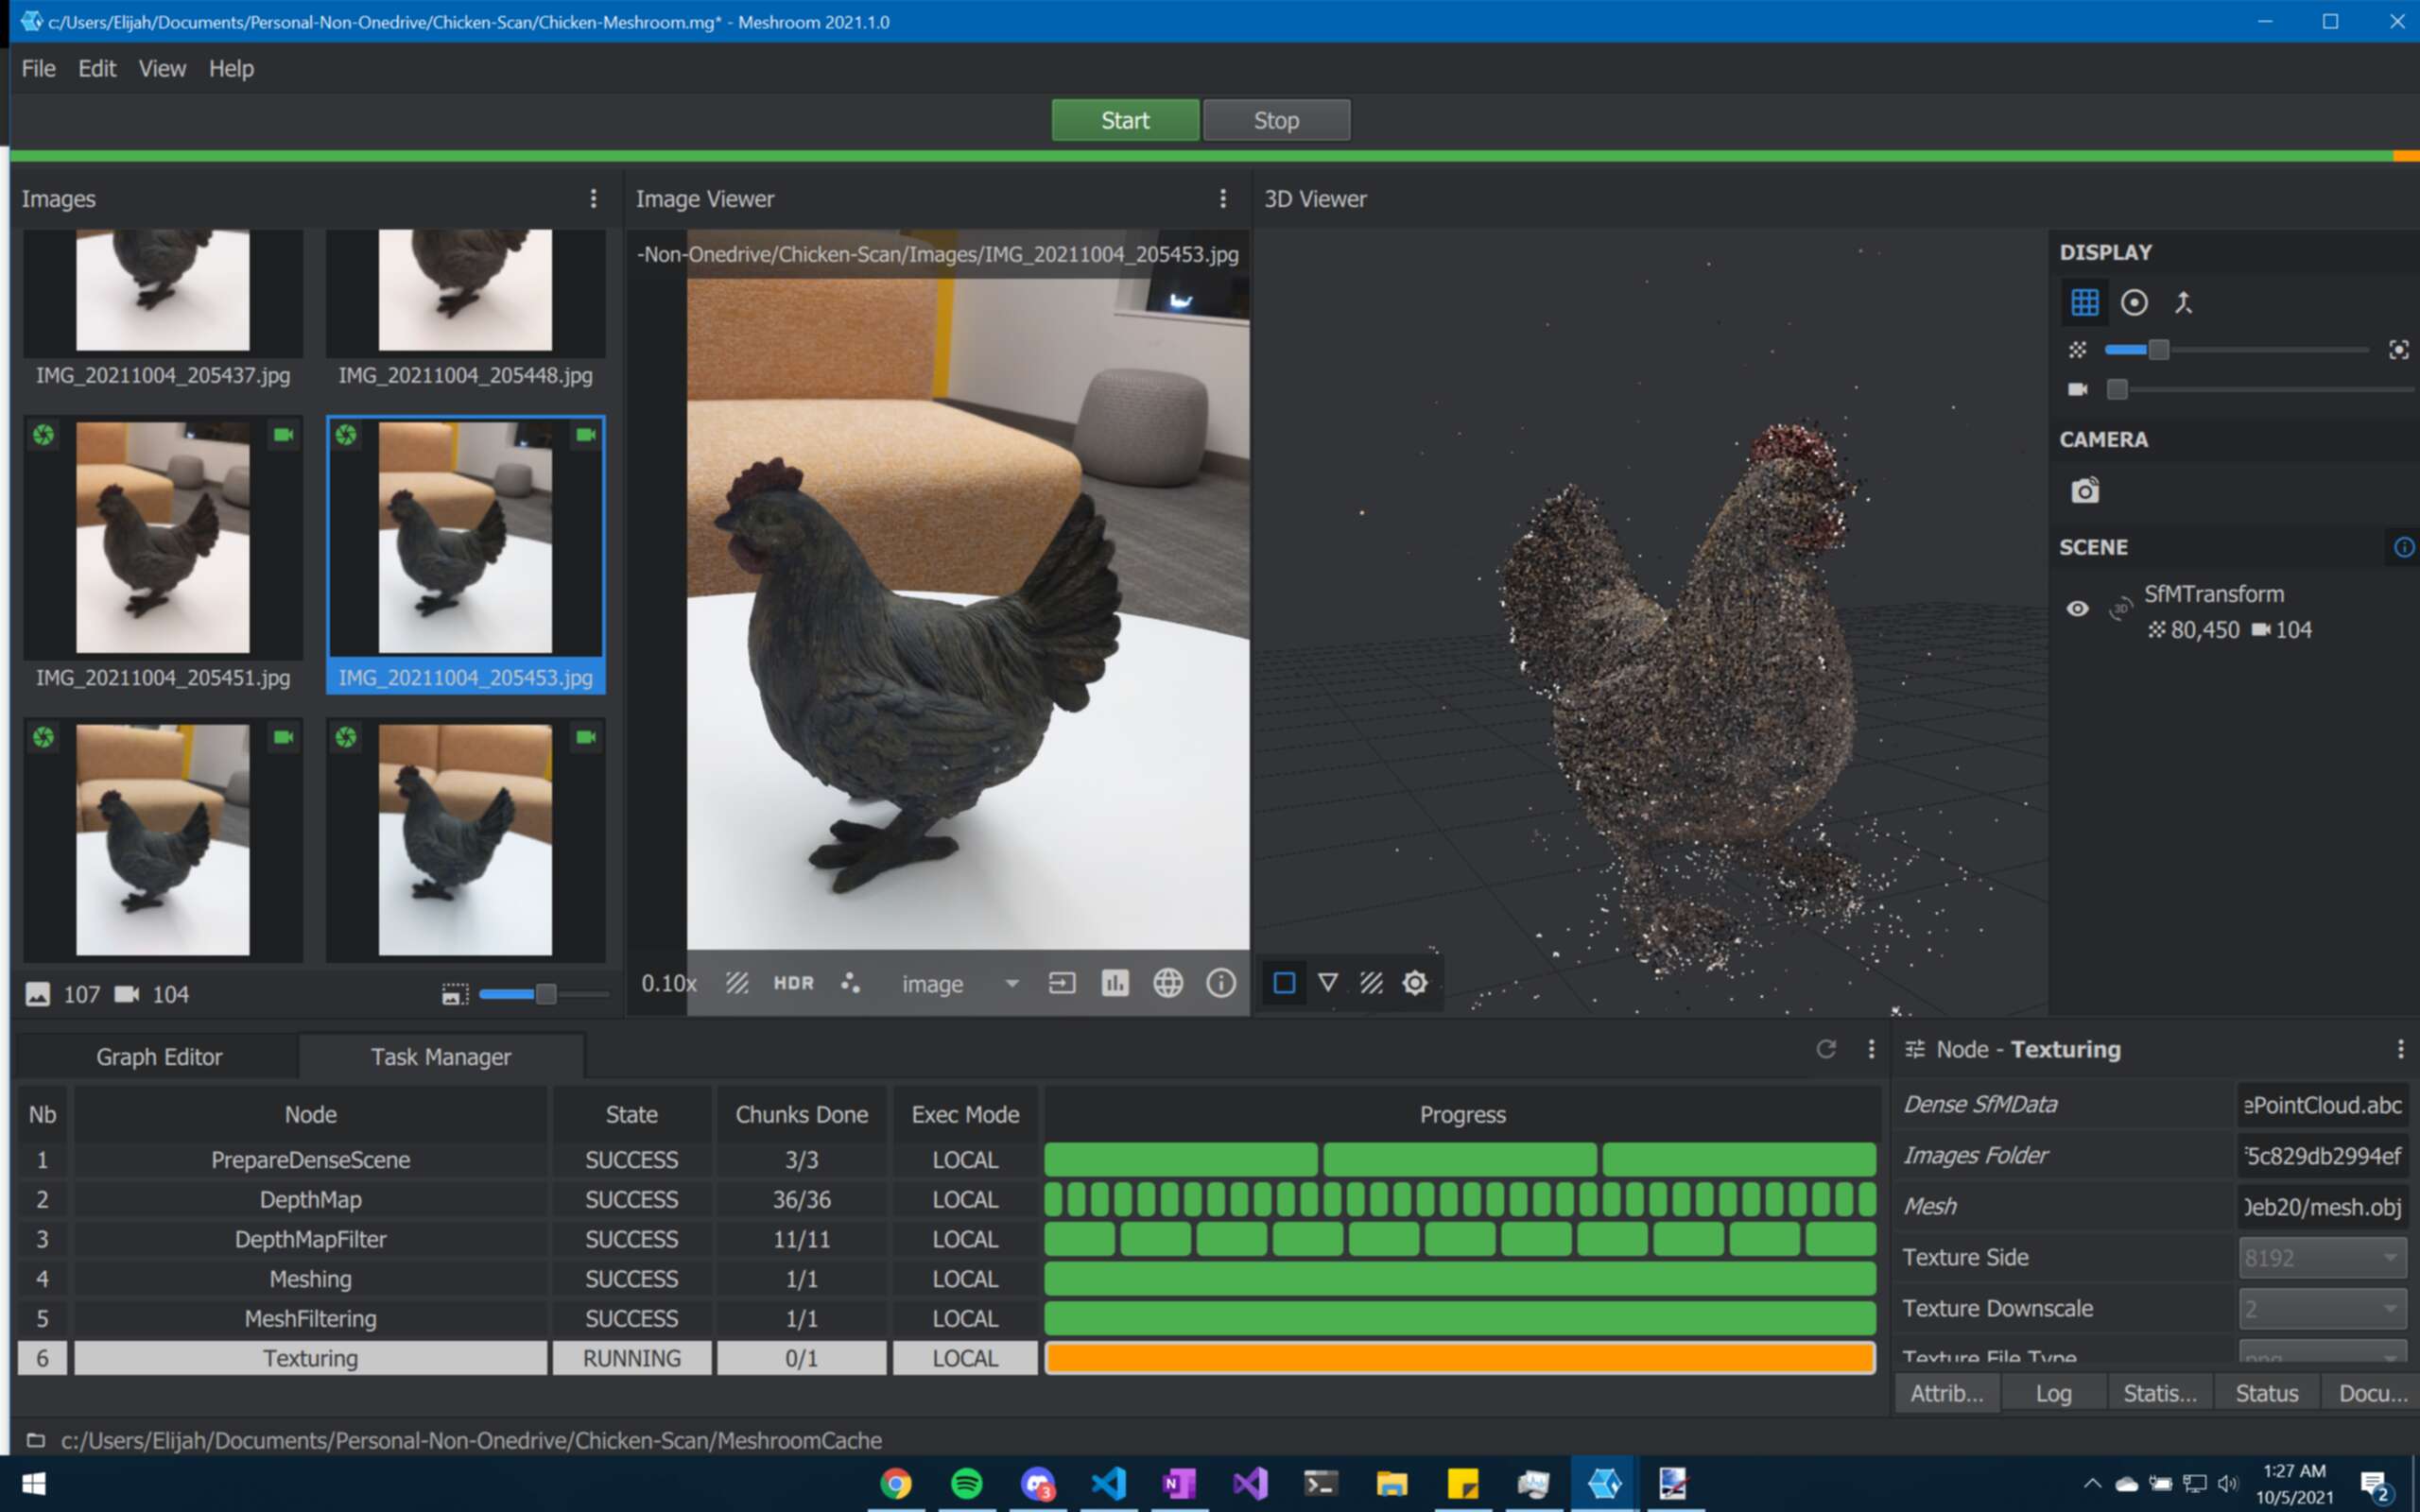
Pretty damn cool right? I think so. It's just dots at this point, but, according to some Youtube videos if I continue the computation, eventually, it will make a proper mesh and texture set. So, after a much more lengthy computation process, I got:
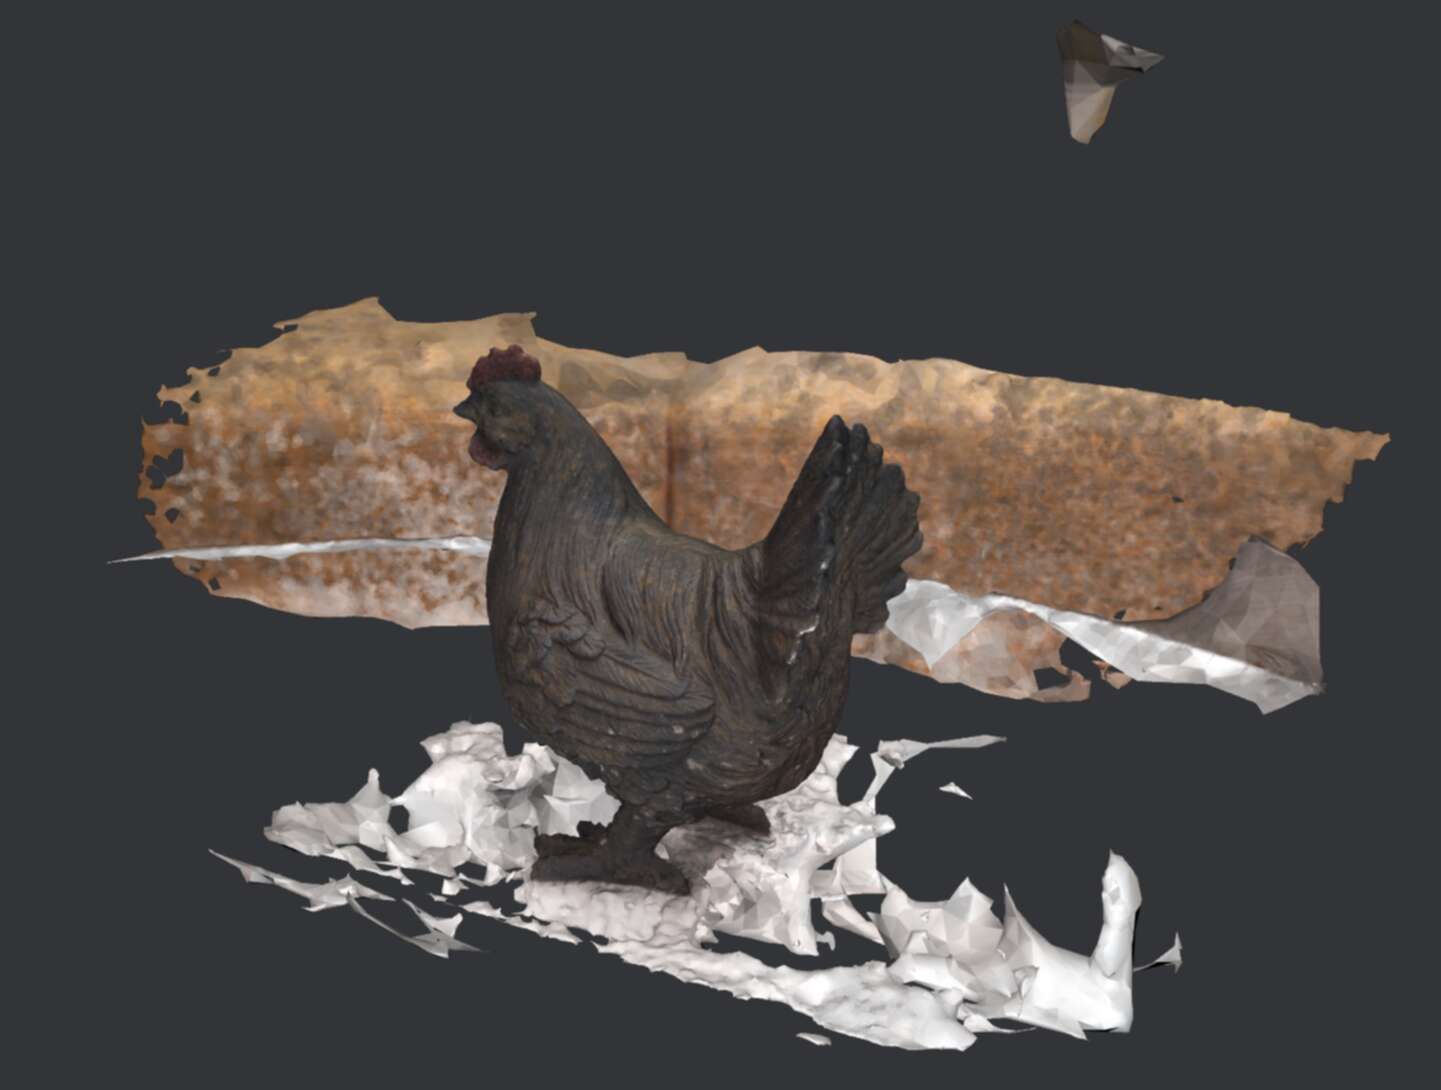
That's it picking up the couch in the background, and the white underneath it is the table ofc. But look at how accurate that model is! Unfortunately, all that extra stuff will have to be removed and I also wanted to fix up the underside a bit, since it didnt get scanned too well. So, remembering Blender from when I had last used it 6 years ago, I decided to fix up the Mesh using it. So I imported the files into Blender and after some sculpting, vertex decimating, and other adjusting, I went from the top image, to the bottom
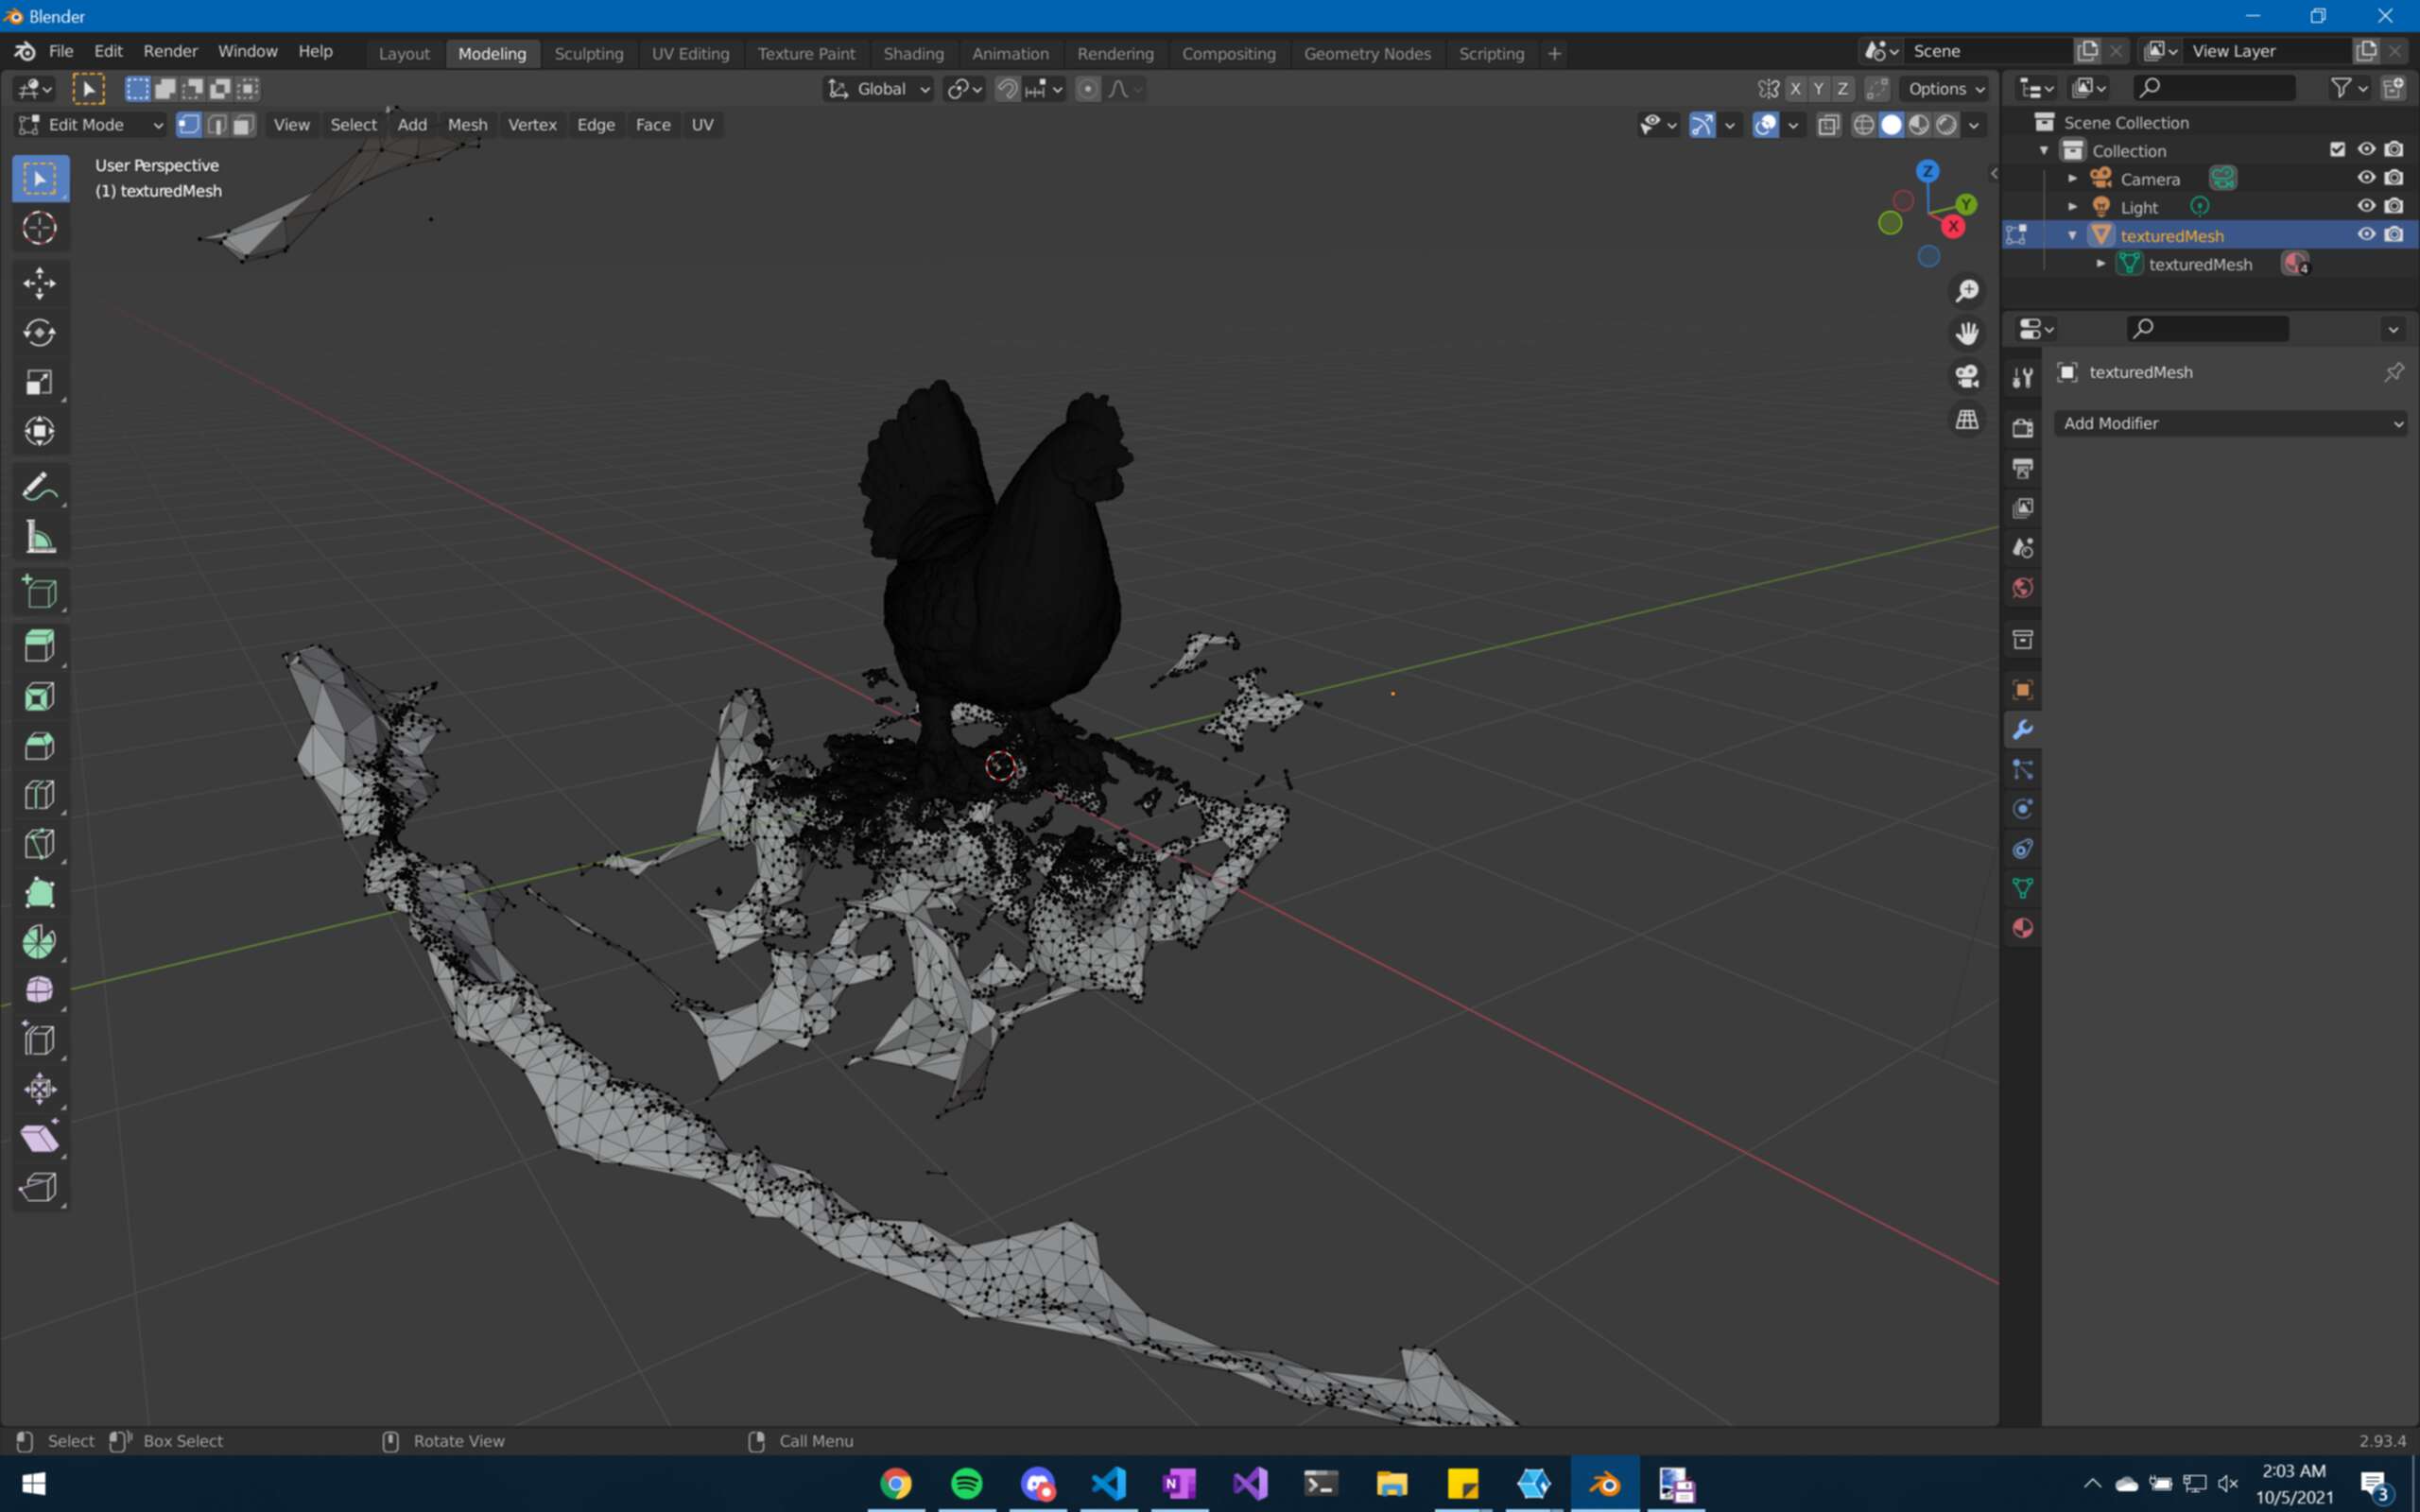
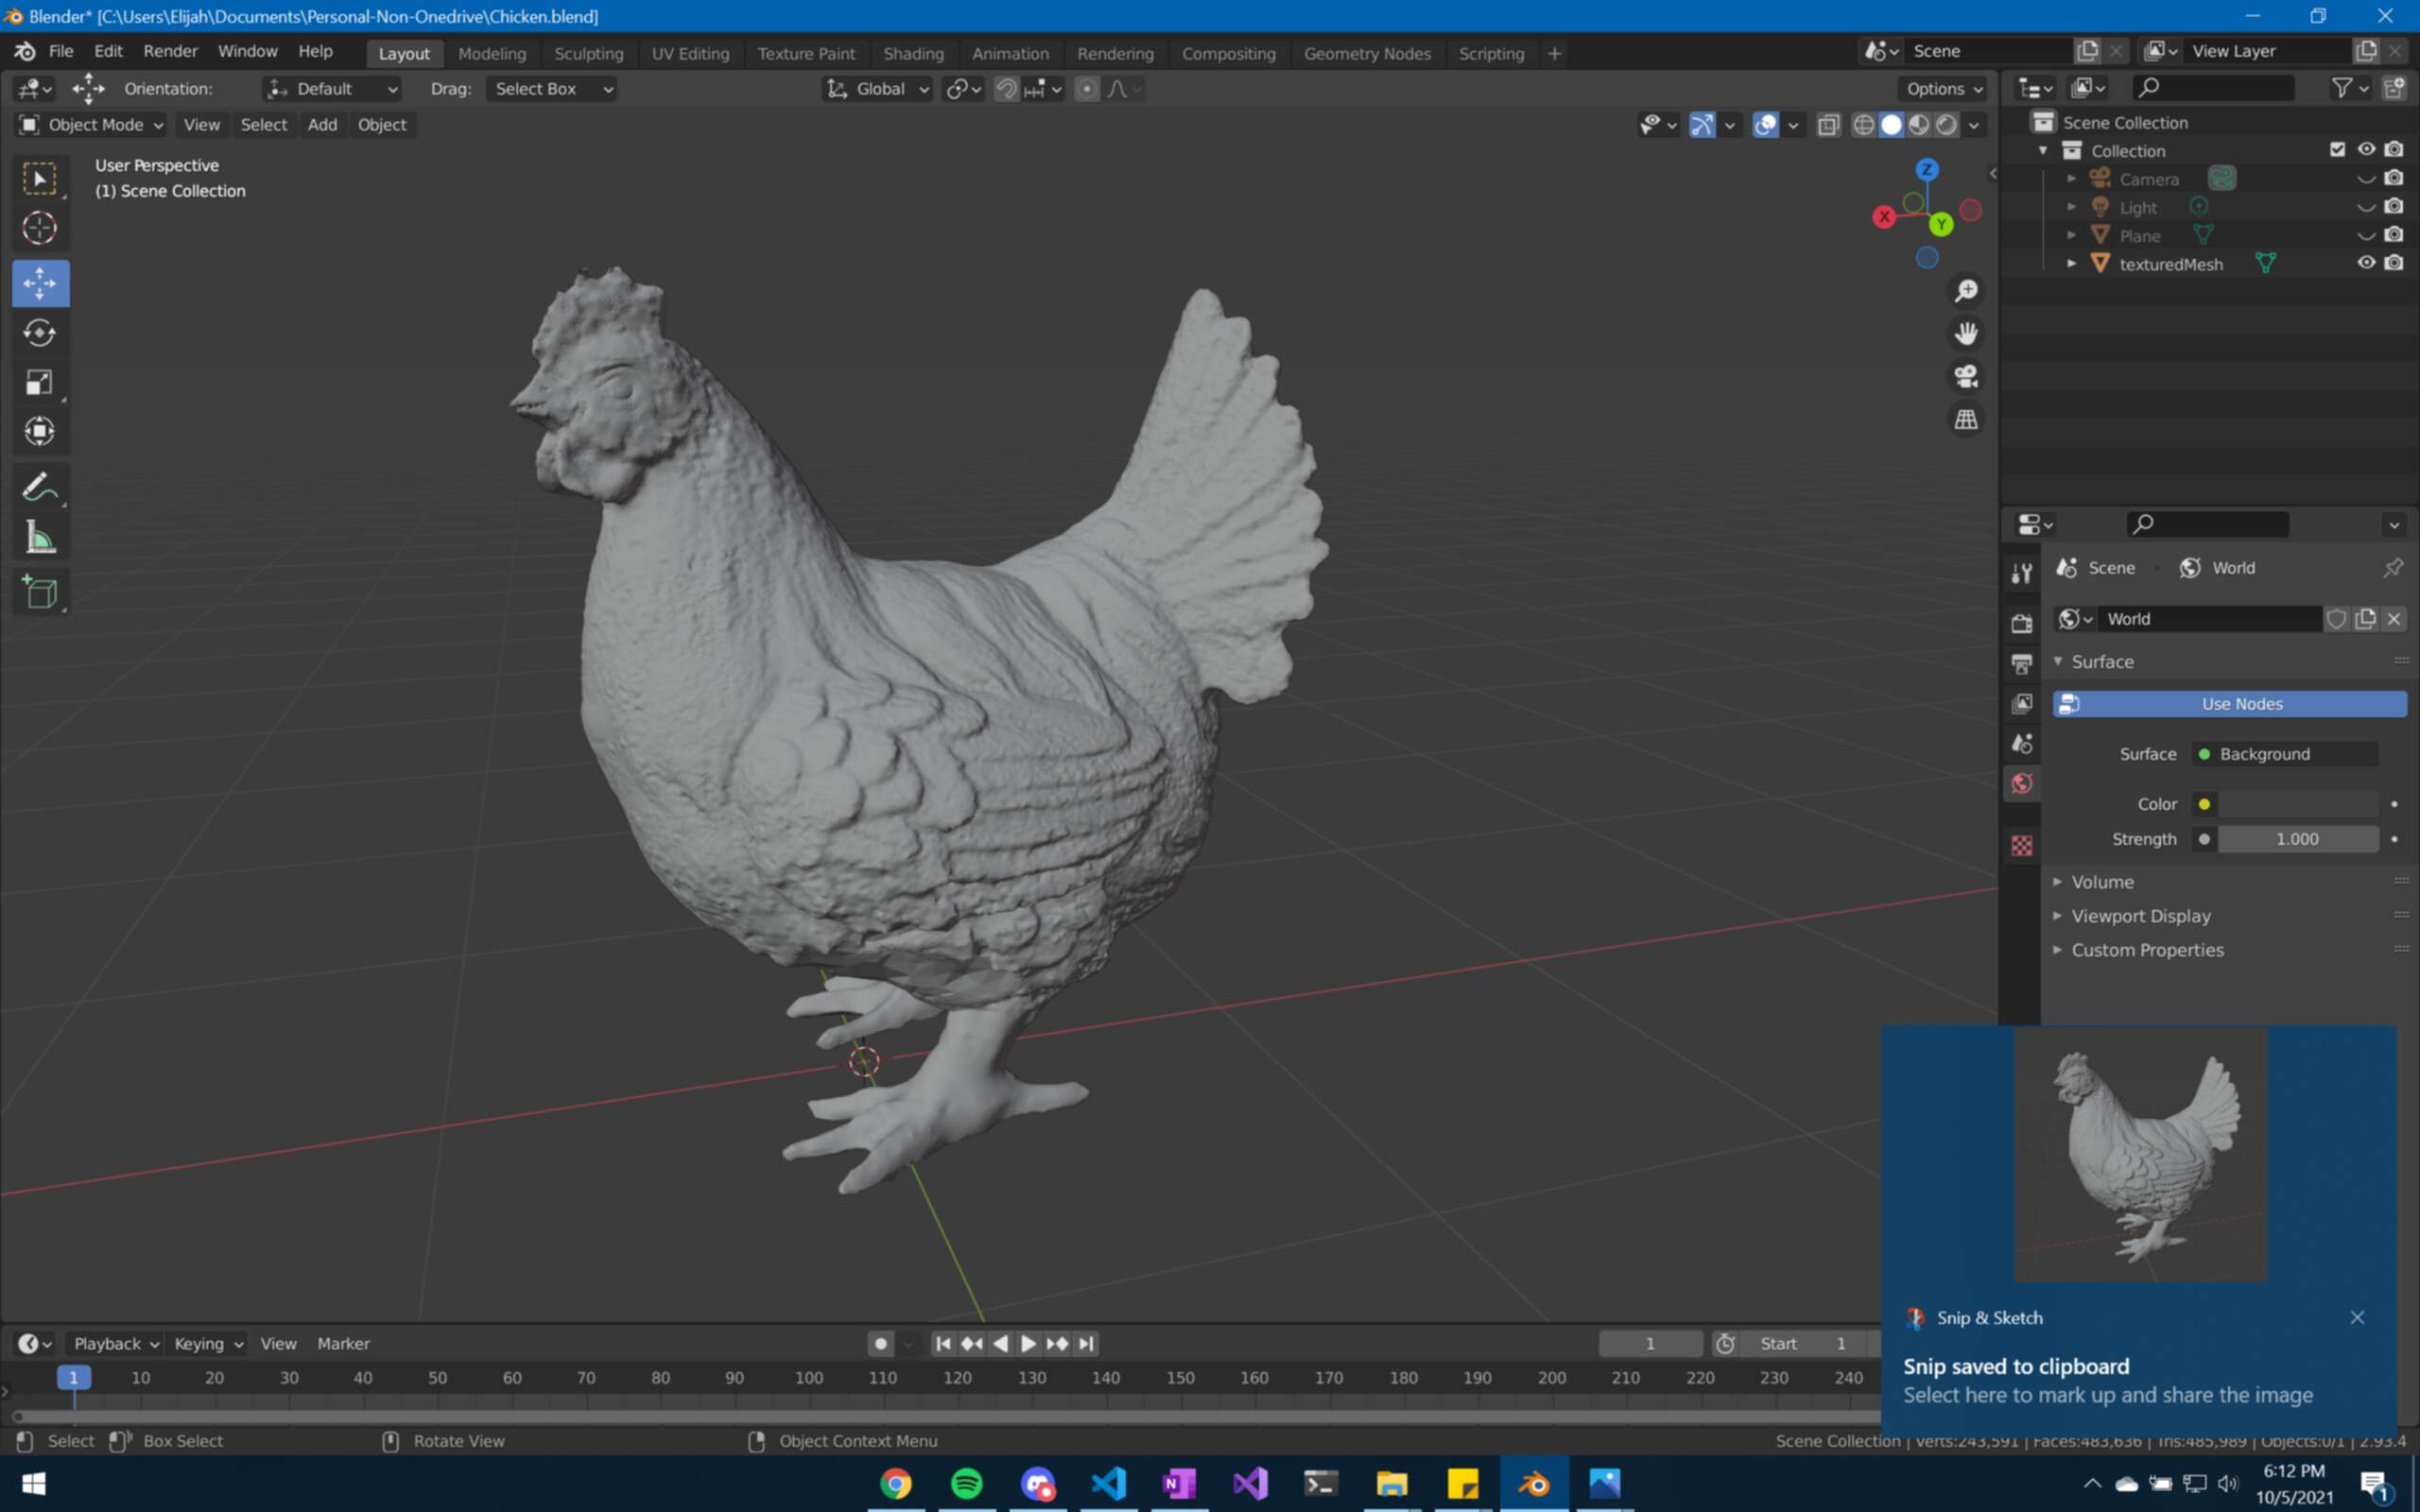
Dodecahedron
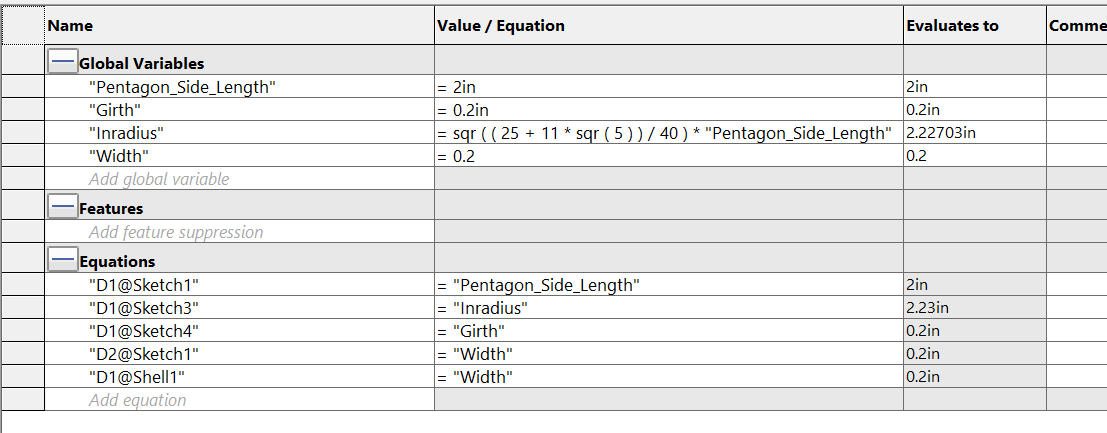
Since I still had to make the print un-machinable to keep with the spirit of the assignment, I decided to put the chicken in a dodecahedron cage. Because a dodecahedron is a mathematically defined shape, I decided that using parameters would be a good way to make it, especially if I decided to change how big it is in the future. I found the following equation online for the inradius of a dodecahedron:

Using that equation I created the following parameters in Solidworks, and used them to create my model. This way, if I want it bigger, all I have to do is change Pentagon_Side_Length and it generates a new dodecahedron for me.
Printing
Now that I had nice, clean models, I just had to put the chicken inside of the dodecahedron. Unfortunately Solidworks didn't like the chicken stl file, I had to do it in the slicer. But when you try to put one object into another in 3DWOX, the second object is teleported out of the way. Eventually I solved this issue by adjusting the dodecahedron to the size and position that I liked, then loading in the chicken file since it doesn't check for collision on loading in objects. It meant I couldn't move anything afterwards, but the chicken was in the cage, and that is all I cared about.
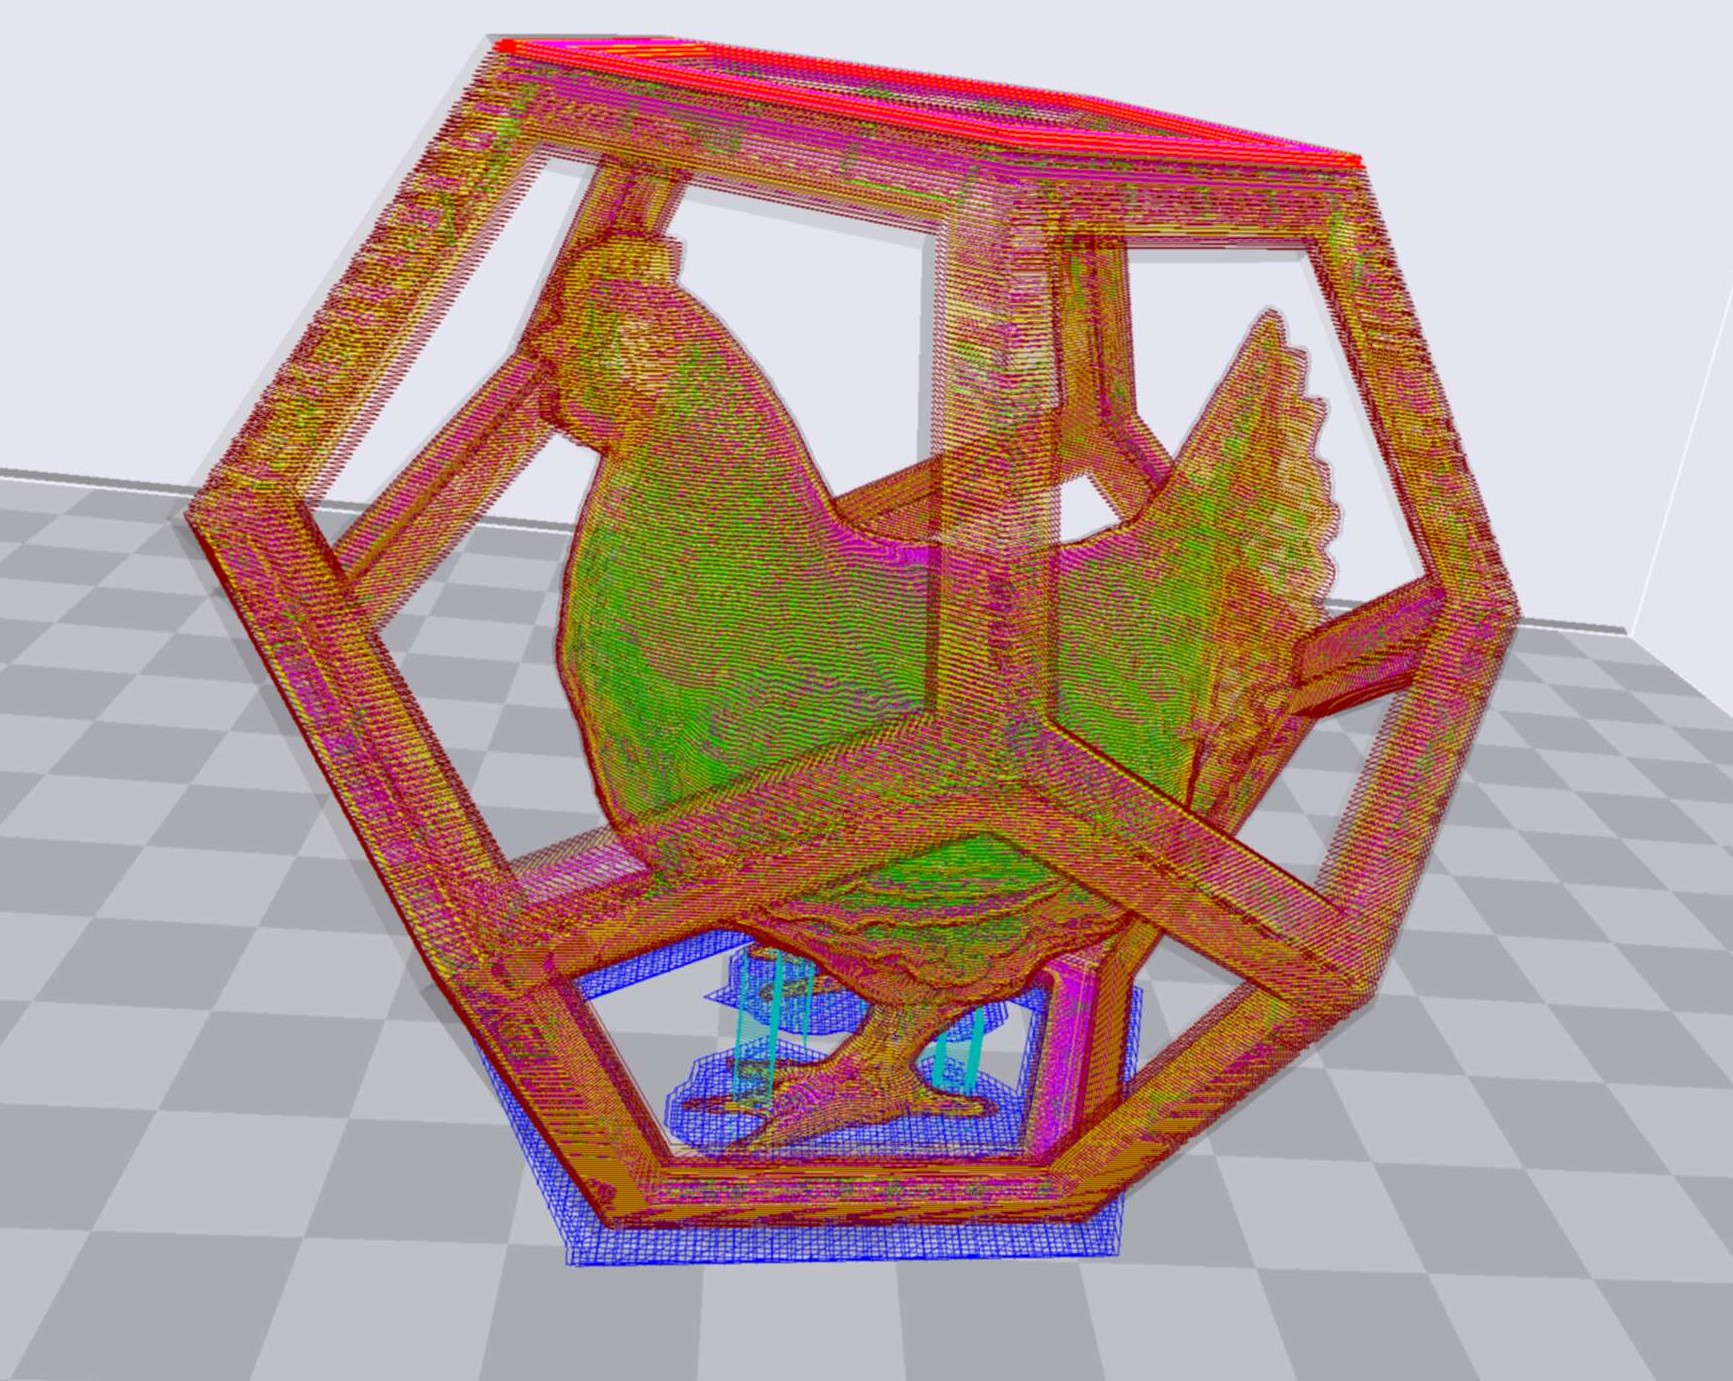
It was looking good, so I stuck it on a thumb drive and tried printing it from the Sindoh. It was looking good, but after a half hour or so I noticed that one of the chicken feet was just a ball of spaghetti.
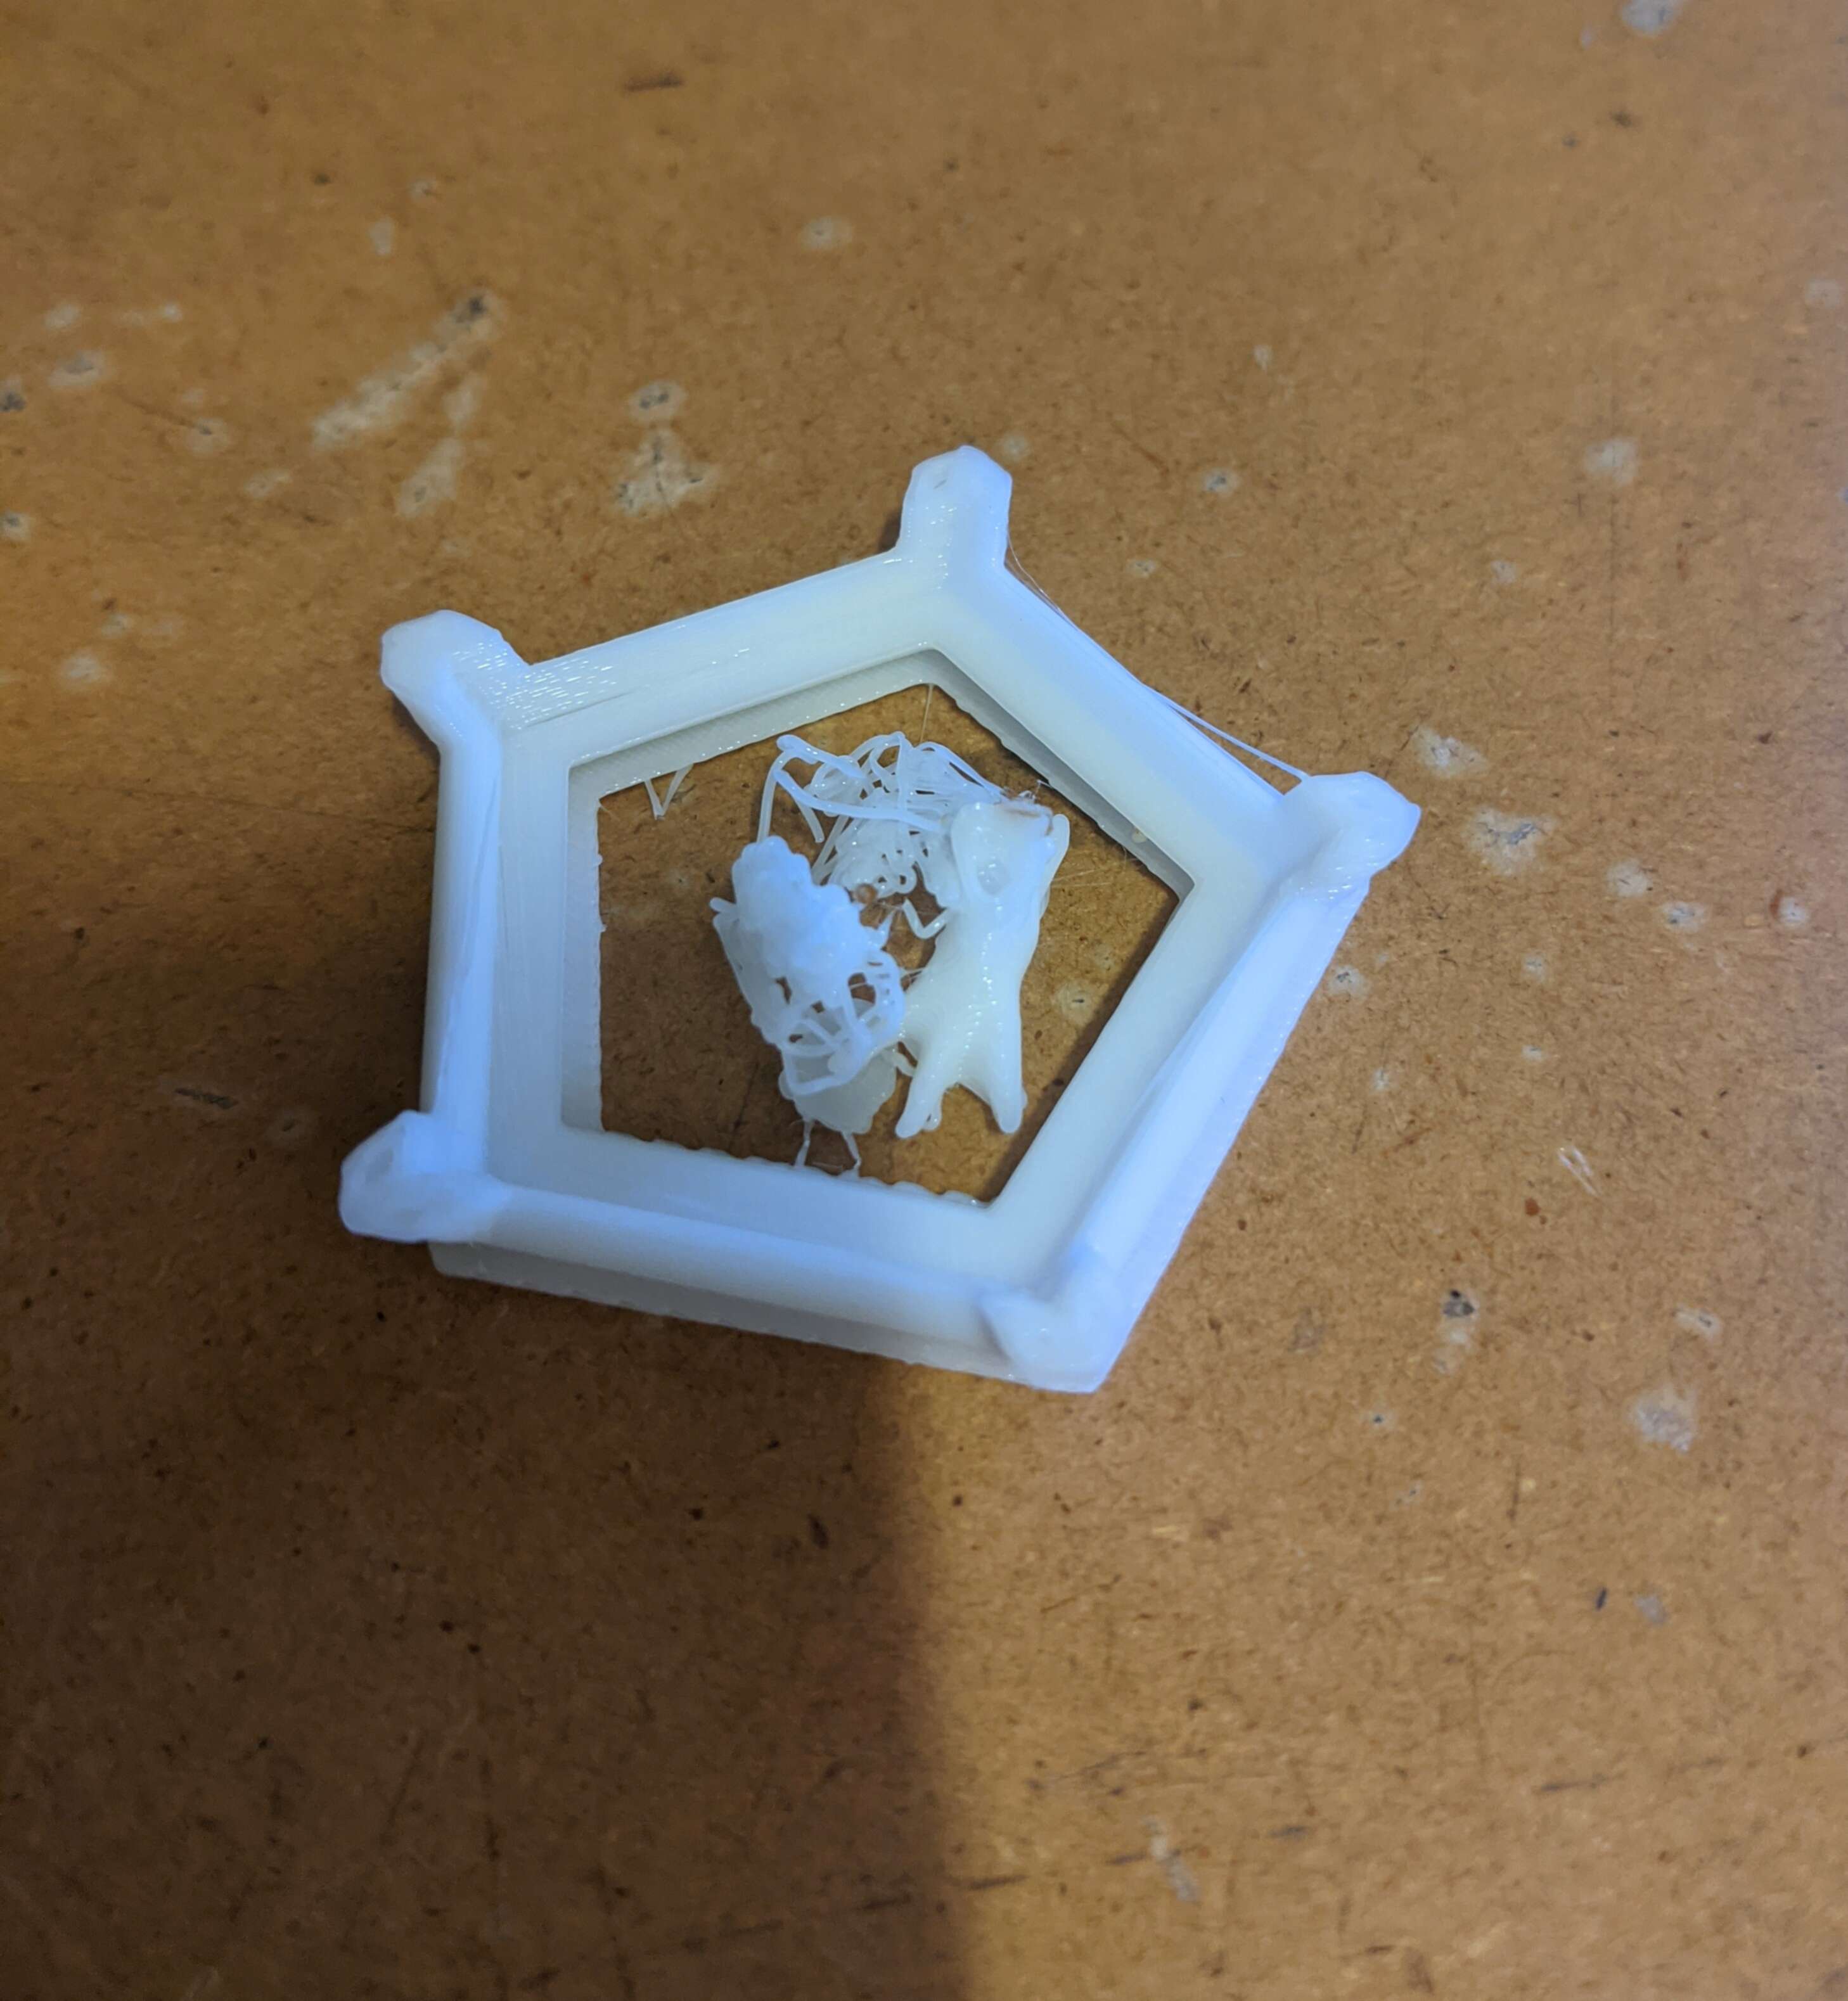
So I stopped the print, checked the slicer, and added support underneath the failed chicken foot. That fixed the issue, and it printed well after:
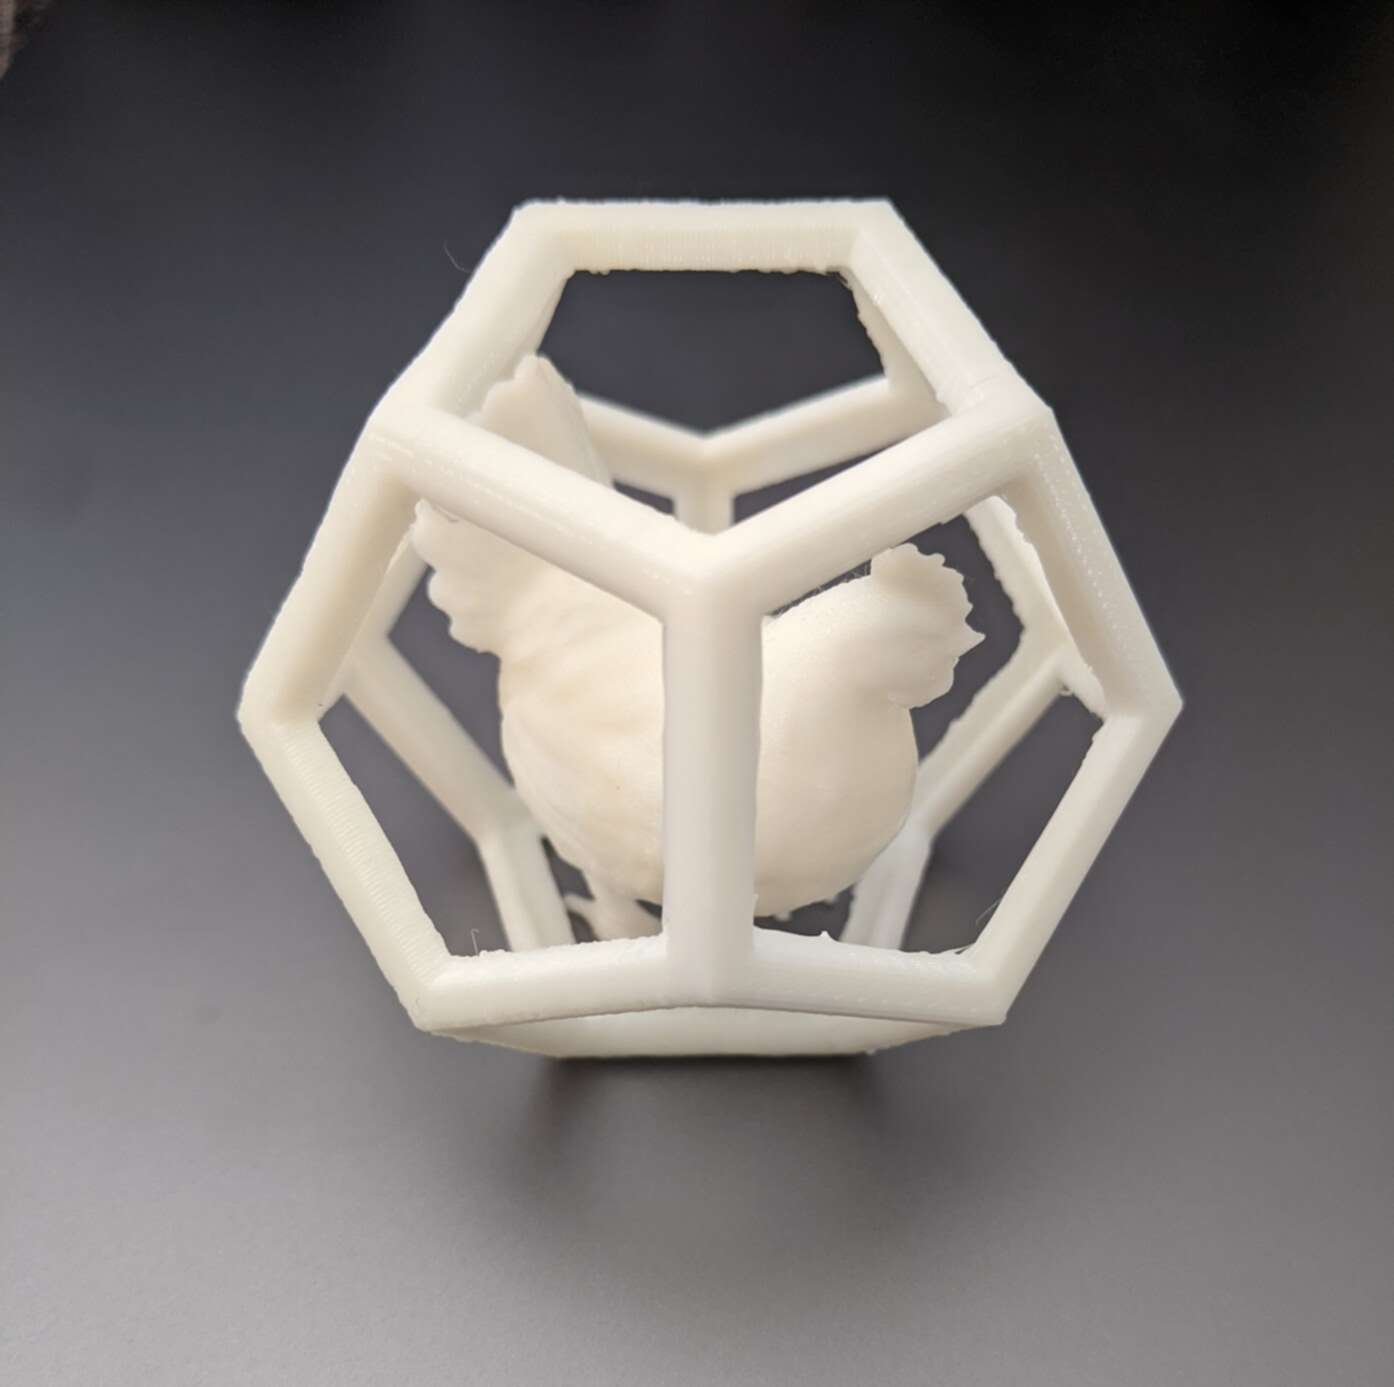
Unfortunately, when I was removing the support from the feet, one of the feet snapped off at the ankle. Thankfully, super glue exists, and it was an easy fix. Regardless, I was pretty impressed at how relatively simple the whole process was. Think about how difficult this would have been just 10 years ago. 3D scanning software was not nearly as good, Blender was a lot less easy to use, and 3D printers were less reliable with crappier software. If I had to do it again, I could do the whole process (ignoring printing) of taking photos, rendering the photos into a model, cleaning up the model, CADing the dodecahedron, then putting the models together, and finally slicing them, in under 2 hours.
- 3DWOX G-code
- Stl file
- Dodecahedron SLDPRT
- Dodecahedron STL
- The Meshroom files are gigabytes in size, so I can't link them